便利なTextInputLayoutとその内部実装
はじめに
Material Designにいつの間にか入っていたTextInputLayoutが便利なのでメモを残す。
TextInputLayout とは
公式ドキュメント によると、TextInputLayout とは「テキストを入力する時にhintを隠す代わりにfloating labelを表示するEditTextをラップしたview」らしい。
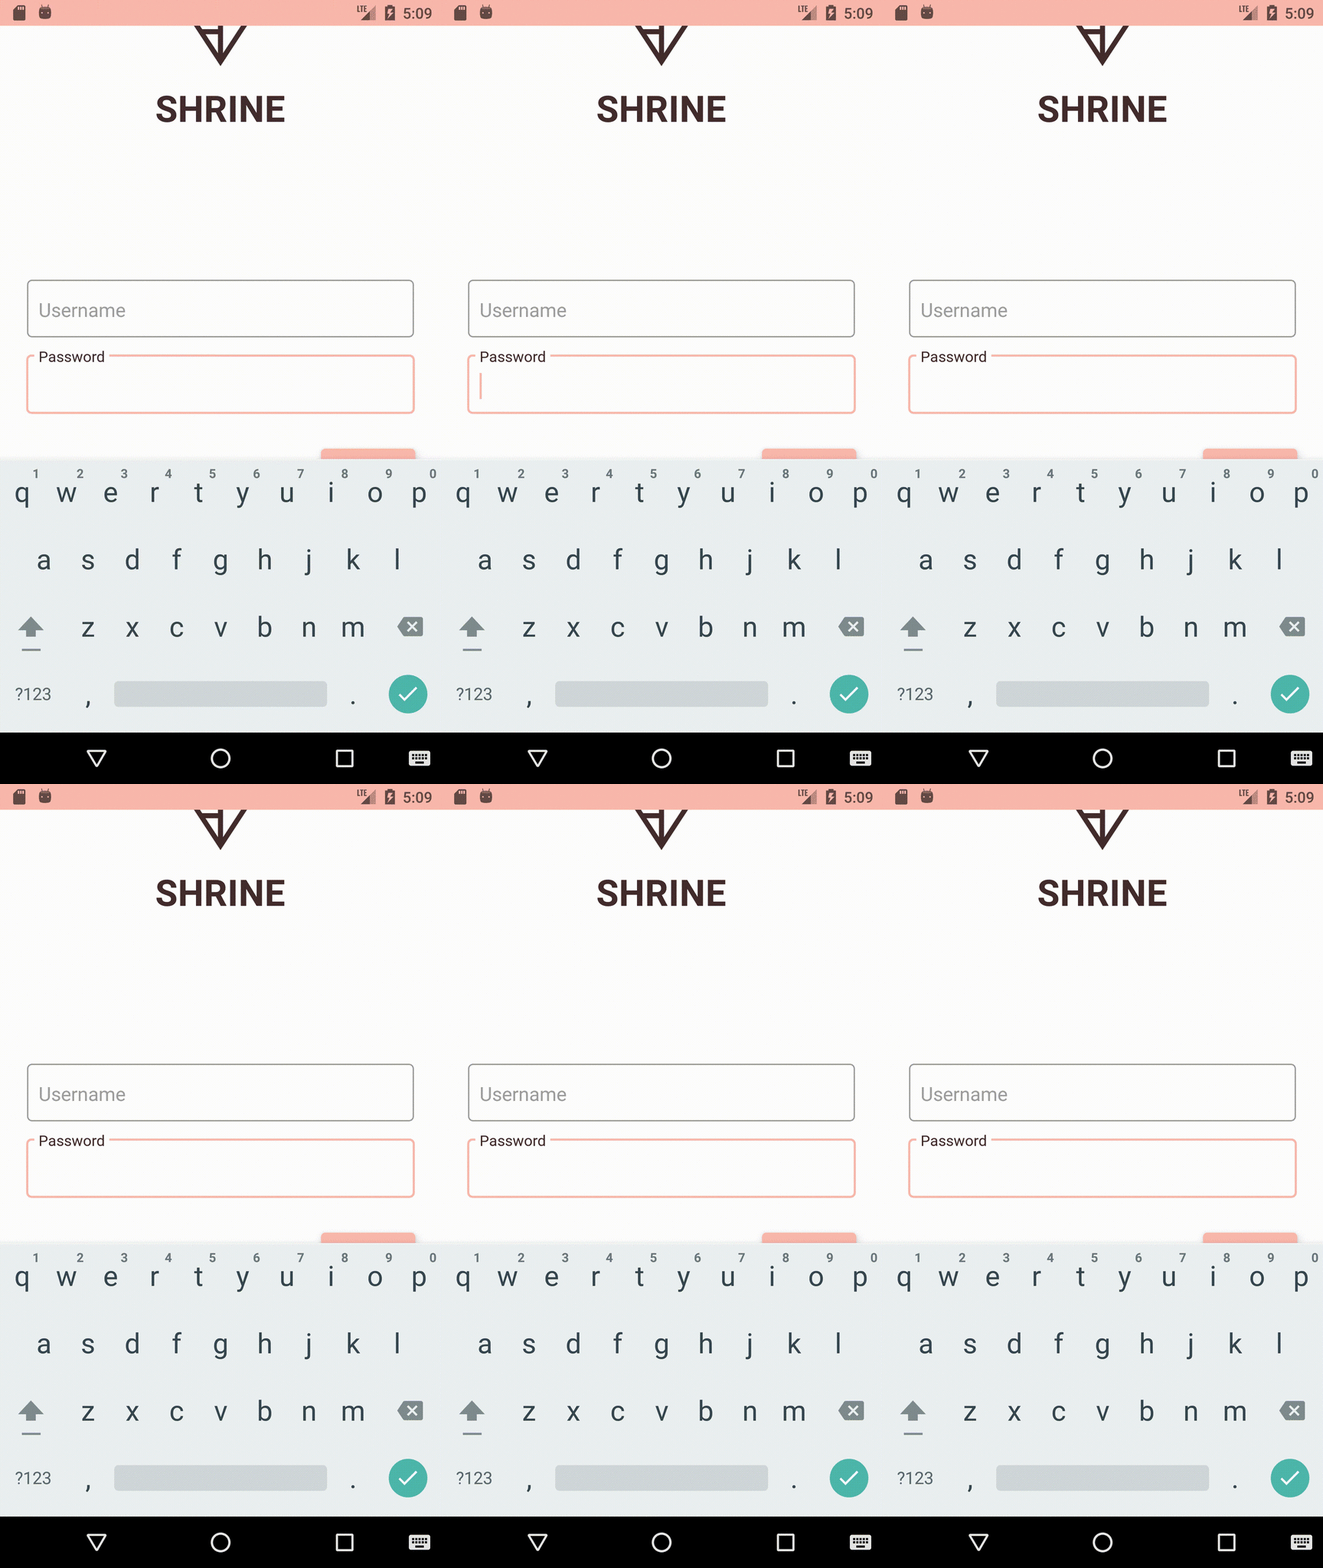
これだけ読んでも謎だと思うので、Google Code LabのMaterial Design Componentsのコースをgit cloneしてきて動かしてみるとわかりやすいです。
あとは最近WebのGoogle Login画面でこのcomponentが使われている気がする。
MDC-104 Android: Material Advanced Components (Kotlin)
なんかgifがうまくアップロードできなくてanimation部分が見えない…

ちなみに上記はstyleにWidget.MaterialComponents.TextInputLayout.OutlineBoxが設定されている。
どうやってhintを動かしているのか?
せっかくなのでこのhintのanimationがどのように実装されているのかコードを読んでみた。
ちなみに上記のCode Labからgit cloneしてきたプロジェクトだとTextInputLayout はAndroidXではなく com.android.support:support-v4:28.0.0-alpha3 だったので、これを読んでいく。
animationしているのは下記のメソッド。このメソッドの引数のfloatには、collapseの場合は1.0F, expandの時は0.0Fが渡される。
    @VisibleForTesting
    void animateToExpansionFraction(float target) {
        if (this.collapsingTextHelper.getExpansionFraction() != target) {
            if (this.animator == null) {
                this.animator = new ValueAnimator();
                this.animator.setInterpolator(AnimationUtils.FAST_OUT_SLOW_IN_INTERPOLATOR);
                this.animator.setDuration(167L);
                this.animator.addUpdateListener(new AnimatorUpdateListener() {
                    public void onAnimationUpdate(ValueAnimator animator) {
                        TextInputLayout.this.collapsingTextHelper.setExpansionFraction((Float)animator.getAnimatedValue());
                    }
                });
            }

            this.animator.setFloatValues(new float[]{this.collapsingTextHelper.getExpansionFraction(), target});
            this.animator.start();
        }
    }
ValueAnimator を使ってanimationしている。Interpolatorを設定して167Lのdurationをセット。(なんで167に決まったんだろう?)
で現在のexpansion fractionをHelperクラスからとってきて、そこから引数のtargetまでをvalueの変更幅に指定する。
start()を読んでやるとlistenerに設定したcallback methodが呼ばれる。
実際にviewをanimationするのはまたもやhelperクラスの方に移譲している。
    public void setExpansionFraction(float fraction) {
        fraction = MathUtils.clamp(fraction, 0.0F, 1.0F);
        if (fraction != this.expandedFraction) {
            this.expandedFraction = fraction;
            this.calculateCurrentOffsets();
        }

    }
    private void calculateOffsets(float fraction) {
        this.interpolateBounds(fraction);
        this.currentDrawX = lerp(this.expandedDrawX, this.collapsedDrawX, fraction, this.positionInterpolator);
        this.currentDrawY = lerp(this.expandedDrawY, this.collapsedDrawY, fraction, this.positionInterpolator);
        this.setInterpolatedTextSize(lerp(this.expandedTextSize, this.collapsedTextSize, fraction, this.textSizeInterpolator));
        if (this.collapsedTextColor != this.expandedTextColor) {
            this.textPaint.setColor(blendColors(this.getCurrentExpandedTextColor(), this.getCurrentCollapsedTextColor(), fraction));
        } else {
            this.textPaint.setColor(this.getCurrentCollapsedTextColor());
        }

        this.textPaint.setShadowLayer(lerp(this.expandedShadowRadius, this.collapsedShadowRadius, fraction, (TimeInterpolator)null), lerp(this.expandedShadowDx, this.collapsedShadowDx, fraction, (TimeInterpolator)null), lerp(this.expandedShadowDy, this.collapsedShadowDy, fraction, (TimeInterpolator)null), blendColors(this.expandedShadowColor, this.collapsedShadowColor, fraction));
        ViewCompat.postInvalidateOnAnimation(this.view);
    }
currentDrawXやcurrentDrawYそのほか諸々の計算を済ませておいてpostInvalidateOnAnimation()をコールして描画し直す時にその値を使う感じっぽい。
ViewCompat.postInvalidateOnAnimation() を辿っていくとView#invalidate() が呼ばれていることがわかる。
postInvalidateOnAnimation() の引数にはTextInputLayoutが渡されているので、このクラスのdraw()をみてみるとhelperクラスのdraw()が呼ばれている。
    public void draw(Canvas canvas) {
        if (this.boxBackground != null) {
            this.boxBackground.draw(canvas);
        }

        super.draw(canvas);
        if (this.hintEnabled) {
            this.collapsingTextHelper.draw(canvas);
        }

    }
この中でcalculateOffsets() で計算したx,yの値やsetInterpolatedTextSize()の内部で計算・設定されているscaleを使ってviewを動かしている。
動かすのはcanvasに対してscale()とかdrawBitmap()/drawText()とかをコールして実装している。
(あまり関係ないけどvar10000とかvar7の変数はなんのために作られたのかわからない…)
    public void draw(Canvas canvas) {
        int saveCount = canvas.save();
        if (this.textToDraw != null && this.drawTitle) {
            float x = this.currentDrawX;
            float y = this.currentDrawY;
            boolean drawTexture = this.useTexture && this.expandedTitleTexture != null;
            float ascent;
            if (drawTexture) {
                ascent = this.textureAscent * this.scale;
                float var10000 = this.textureDescent * this.scale;
            } else {
                ascent = this.textPaint.ascent() * this.scale;
                float var7 = this.textPaint.descent() * this.scale;
            }

            if (drawTexture) {
                y += ascent;
            }

            if (this.scale != 1.0F) {
                canvas.scale(this.scale, this.scale, x, y);
            }

            if (drawTexture) {
                canvas.drawBitmap(this.expandedTitleTexture, x, y, this.texturePaint);
            } else {
                canvas.drawText(this.textToDraw, 0, this.textToDraw.length(), x, y, this.textPaint);
            }
        }

        canvas.restoreToCount(saveCount);
    }
アニメーションが早すぎて見えないけどTextColorもアニメーションに合わせて徐々に変わるように設定されていて細かい。すごい。でも見えない。
    private static int blendColors(int color1, int color2, float ratio) {
        float inverseRatio = 1.0F - ratio;
        float a = (float)Color.alpha(color1) * inverseRatio + (float)Color.alpha(color2) * ratio;
        float r = (float)Color.red(color1) * inverseRatio + (float)Color.red(color2) * ratio;
        float g = (float)Color.green(color1) * inverseRatio + (float)Color.green(color2) * ratio;
        float b = (float)Color.blue(color1) * inverseRatio + (float)Color.blue(color2) * ratio;
        return Color.argb((int)a, (int)r, (int)g, (int)b);
    }
2018年後半を振り返る
はじめに
2018年後半に自分が何をしていたか後から振り返られるようにメモを残しておく。前回のまとめはこちら。
7月
ランチでビリヤニ食べたら風邪なおってきた気がする
— むーむー/Atsuko FUKUI (@muumuumuumuu) July 3, 2018
今年はスパイス系の料理にハマっていた。特に六本木ヒルズ内のインド料理屋さんのビリヤニ美味しいのでたくさん食べた気がする。
Go Bold Day楽しかったー!!私たちのチームはデザイナーさんがPalo Altoにいて時差というハンデがありながらも3位に入賞しました☺️🥉/ US版メルカリ開発チームでGo Bold Daysを開催したよ #メルカリな日々 2018/07/05 - mercan(メルカン) https://t.co/q60PUhaRnT
— むーむー/Atsuko FUKUI (@muumuumuumuu) July 6, 2018
Go Bold Dayというチームのハッカソンに参加して3位入賞した。ご褒美に高級すき焼きランチ美味しかった!
この前のDroid GirlsでML Kitやったのでクレカの番号読み取りできるか試してみたけど、12桁のうち読み取れたのは2桁だけだった…やっぱりカードの文字認識は難しいんだなぁ😢
— むーむー/Atsuko FUKUI (@muumuumuumuu) July 14, 2018
この頃はクライアント側で軽量に動くOCRに興味があったんだけど、なかなかいいやつに出会えない…クレカの文字認識むずかしすぎでは????
ブログ書いたらいろんな人から知見が集まってくるの本当に感謝しかないし、投げ銭で感謝のお気持ち示したい定期
— むーむー/Atsuko FUKUI (@muumuumuumuu) July 16, 2018
これ今年なんども言っている気がする。twitterとかblogとかでめっちゃ勉強になること教えてくれる人に投げ銭送りたいのでみんなtwitterのbioになんかそれ系サービスのリンク貼っててほしいお気持ち。
きました!数ヶ月前まで下の階にいたのにeurekaさんのオフィス初めて! #MokuMokuEureka https://t.co/d4aMThbt1M
— むーむー/Atsuko FUKUI (@muumuumuumuu) July 17, 2018
メルカリ Androidもくもくやろうぜ会 #9 を公開しました! https://t.co/4dzeCxQf7Q #mokumoku_android
— むーむー/Atsuko FUKUI (@muumuumuumuu) July 24, 2018
もくもく会、最近主催も参加もできてないので来年はもうちょっとやりたい。
@ozyozyo Are you going to support Kotlin? Or Kotlin native?😎
— むーむー/Atsuko FUKUI (@muumuumuumuu) July 12, 2018
kotlin sdk has been released~~!!! https://t.co/13uJK9lKsP
— 小城 久美子 / koshiro kumiko (@ozyozyo) July 27, 2018
Clova開発の中の人に「SDKはKotlin対応しないの?」って聞いてしばらくレスがなかった後に突然Kotlin対応がリリースされたのめっちゃいい話だった。
8月
大学時代の友達に会ってきた〜〜みんな子持ちで赤ちゃん触らせてもらったんだけどなんであんなに柔らかいの〜〜〜〜可愛い〜〜〜〜〜3歳くらいもお母さんに甘えたい盛りで可愛い〜〜〜〜〜☺️☺️☺️☺️☺️
— むーむー/Atsuko FUKUI (@muumuumuumuu) August 12, 2018
大学時代の友人と会っていた。みんなママになってた!
バリウムって30になったら飲むものと思っていたので挙動不審になってしまった。バリウム直前に炭酸飲んだせいか今日何も食べてないのに全くお腹すかない
— むーむー/Atsuko FUKUI (@muumuumuumuu) August 15, 2018
バリウムデビューした。みんなこんな怖い思いするのか…?検査終わった後に渡される下剤の量を自分で調節しろとか正気か…?など色々学びがあった。世界は思ったよりも運用でカバーされている。
布教失敗した😇 pic.twitter.com/kmH3mjXzo7
— むーむー/Atsuko FUKUI (@muumuumuumuu) August 22, 2018
会社でKotlinの可愛さを布教しようとして失敗。(Kotlinの良さは理解してもらったのでよしとする)
今日は社内AndroidエンジニアでランチLT大会をorganizeしたけど我ながらいい仕事した☺️ 発表やってくれたみんなありがとう!発表勢豪華だった😍
— むーむー/Atsuko FUKUI (@muumuumuumuu) August 23, 2018
今週の残りuniposが無さすぎて一緒にorganizerやった @callipan に10円くらいしか送れなかったのだけが心残り!すまん!次もよろしくな!
この前やっていい感じだった社内AndroidエンジニアでランチLT大会の様子です〜〜☺️☺️一部スライドも公開しているのでぜひみてください!!!!!🙏🙏🙏https://t.co/acYZeqtv1n
— むーむー/Atsuko FUKUI (@muumuumuumuu) September 5, 2018
社内LT大会を開催した。楽しかった!
9月
買ったばかりのイヤリング帰り道で失くしたー!12時間持たなかった…
— むーむー/Atsuko FUKUI (@muumuumuumuu) September 11, 2018
イヤリングを片方だけなくすのをたくさん繰り返した一年だった。最近は落とす前提で、落とした時に気がつけるように大きなイヤリングを買う作戦に切り替えている。
Droid Kaigi 2019はじまった!!今年はスタッフとして参加予定なので応募は見送り!みんなどんどん応募してほしい🙌🙌🙌 https://t.co/53GPDAWNmD
— むーむー/Atsuko FUKUI (@muumuumuumuu) September 21, 2018
DroidKaigiのCfP募集が開始。今年はスタッフとして参加するので応募は見送りました。
20代最後の日、いい1日だった
— むーむー/Atsuko FUKUI (@muumuumuumuu) September 25, 2018
30歳になりました。
10月
Matthewと一緒にHigh意識なUS Androidチームについて話します!!!聞きに来てね!!https://t.co/HETvw22zR1
— むーむー/Atsuko FUKUI (@muumuumuumuu) September 4, 2018
US のブースにいます!かわいいノベルティあるのでぜひ!! #mtc18 pic.twitter.com/hHI43xPSld
— むーむー/Atsuko FUKUI (@muumuumuumuu) October 4, 2018
お越しいただいた皆様、今日はありがとうございましたー!!
— むーむー/Atsuko FUKUI (@muumuumuumuu) October 4, 2018
リハーサルで9割噛んでいた「各拠点 」を本番では噛まずに言えたので私はハッピーです☺️
自社のTech Confで登壇した。USチームとしてブースも出していました。
技術書展に初参戦!メルカリの本を売ります! pic.twitter.com/kl50WOppcN
— むーむー/Atsuko FUKUI (@muumuumuumuu) October 8, 2018
技術書典、めちゃめちゃ気軽にお金が飛んでいくの実際に体験するとびっくりする
— むーむー/Atsuko FUKUI (@muumuumuumuu) October 8, 2018
技術書店で売り子をしました。
最近本当にルー大柴化が止まらない
— むーむー/Atsuko FUKUI (@muumuumuumuu) October 17, 2018
本当にルー大柴化が止まらない。英語勉強中の私と日本語勉強中の同僚と日々会話すると英語と日本語が混ざってくるのでマジでルー大柴みたいになる。
東海道新幹線のノリで東北新幹線乗ろうとするとヤバい。数十分に一本の間隔でのぞみが来てくれるのは当たり前の事じゃなかったんや…
— むーむー/Atsuko FUKUI (@muumuumuumuu) October 20, 2018
新幹線で隣の席になった素敵なマダムにたくさん飴ちゃんもらった
— むーむー/Atsuko FUKUI (@muumuumuumuu) October 20, 2018
秋田の友人の結婚式に出席するため初めて東北新幹線に乗った。東海道新幹線のつもりで言ったら死ぬやつだった。
ビビりなので検査の結果に安心して診察室で泣き出すというドラマのような事をしてしまった。しかも次回の検査から保険の効く癌検診の方しかやらなくて大丈夫らしい。やったーー!!!
— むーむー/Atsuko FUKUI (@muumuumuumuu) October 29, 2018
会社の健康診断で婦人科系の項目のオプション付いてて本当によかった。ありがとう弊社~~~!!
— むーむー/Atsuko FUKUI (@muumuumuumuu) October 29, 2018
住んでる自治体で受けられたりするけど、あれ2年に一回なんだよなー。実際に引っ越し前に受けたときは何ともなかったからどうせ大丈夫でしょとか思って油断していた。
社の健康診断のオプションが充実いていたおかげで病気の可能性を早めに検出することができた。みなさんちゃんと検診受けましょう。
11月
昨日行った北京料理のお店、今年ベストかもしれないというくらい最高だった…!
— むーむー/Atsuko FUKUI (@muumuumuumuu) November 5, 2018
普段口にする機会がない食材やスパイシーだったり複雑な味わいはもちろん、器にも凄くこだわっていてプレゼンテーションも素敵☺️ランチとは全く別物!https://t.co/yw9FT94owO pic.twitter.com/mDqu1SCryV
お祝いだったので最初だけグラスシャンパーニュで乾杯したけど、そのあとはずっと中国茶を飲んでいたのも自分の中で大事件だった。お酒より温かいお茶飲みたくなるなんて初めて!
— むーむー/Atsuko FUKUI (@muumuumuumuu) November 5, 2018
今年の個人的ベストレストランは多分ここ。
最近なんだか怠惰すぎてダメダメのダメ
— むーむー/Atsuko FUKUI (@muumuumuumuu) November 19, 2018
平日朝8:00-9:00くらいでオンラインもくもく会一緒にやってくれる人が欲しい~~~
— むーむー/Atsuko FUKUI (@muumuumuumuu) November 19, 2018
サボらないように人に監視されていたい~~~
やりたいと言ってくれた人がいたのでやっていくぞ!!
— むーむー/Atsuko FUKUI (@muumuumuumuu) November 19, 2018
一緒にやっていきたい人いたらリプライかDM下さい💪 https://t.co/qAd2hjZKVz
あまりにダメダメだったのでオンライン朝もくもく会をはじめることにした。(この記事ももくもく会で書いています。) 1ヶ月以上ちゃんと続いているので習慣化したと言っても良いでしょう。 参加したい!って人はTwitterでDMください。
12月
昨日行った胡椒料理専門店、最高によかった…特にラム!一年くらいずっと行きたいと思っていたのでハードル高めだったけど満足☺️ワインも南アとか中欧とかあって美味しかった🍷オイル漬けの生胡椒お土産に買ってしまった
— むーむー/Atsuko FUKUI (@muumuumuumuu) December 1, 2018
アパッペマヤジフhttps://t.co/Z6T5aMycp6 pic.twitter.com/XSFxhG1Tf7
前職の人たちとお疲れ様でした会を兼ねた忘年会。ずっと行きたかったお店に行けて最高だった。
来年に向けて
最近ブログの消化がキューではなくスタックになっていて、面白い挙動とか気になる機能とかすぐ手を出しちゃっていて中途半端な下書きがたくさんたまっている
— むーむー/Atsuko FUKUI (@muumuumuumuu) July 17, 2018
たくさん溜まっている下書きちゃんと仕上げてたくさん出していくぞ!
やせるぞ!!!!!!!!!!
— むーむー/Atsuko FUKUI (@muumuumuumuu) September 3, 2018
はい。
Alexaがニュースを読み上げてくれる時に「ぴくせる さん」って言っててほっこり
— むーむー/Atsuko FUKUI (@muumuumuumuu) October 10, 2018
いい加減Pixel 3買うぞ!
代休消化のために露天風呂付のお部屋でのんびり積ん読消化したりマッサージうけたりゴロゴロしたりしたい
— むーむー/Atsuko FUKUI (@muumuumuumuu) October 11, 2018
温泉でゴロゴロするぞ
ついでに空いている棚を利用して未読と既読の本を分けてみたんだけど、未読の棚みるとめちゃめちゃわくわくしてくるので早く全部読みたい
— むーむー/Atsuko FUKUI (@muumuumuumuu) December 16, 2018
たまたまやってみたけど、これは積読消化のいいモチベーションになった。積読消化していくぞ!!
夫シリーズ
今日は結婚記念日なので記念に夫と付き合い始めた2010年のプレイリスト聞いて作業しようhttps://t.co/7GadTpaQU6
— むーむー/Atsuko FUKUI (@muumuumuumuu) July 4, 2018
夫が「花山薫はみんな好きだよ」って言ってて、アニメも漫画も見てないけど私の中で花山薫がめっちゃ人気キャラになってる
— むーむー/Atsuko FUKUI (@muumuumuumuu) July 30, 2018
私「なんで花山薫がそんなに人気なんですか?」
— むーむー/Atsuko FUKUI (@muumuumuumuu) July 31, 2018
夫「漢だからだよ」
一ミリもわからなった😇😇😇
私は夫の事を心から可愛いと思っているんだけど、それを本人に伝えると「30過ぎのおじさんが可愛いとかおかしいんじゃないの…」って引かれる。その通り、きっと数年間ずっと正気を失っているのだ。皆さんも幸せな結婚生活をおくるためにどんどん正気を失っていきましょう。
— むーむー/Atsuko FUKUI (@muumuumuumuu) September 16, 2018
会社の人とBBWにきています w/ 夫氏 pic.twitter.com/g6X3u9aeUo
— むーむー/Atsuko FUKUI (@muumuumuumuu) September 22, 2018
夫(32)がサンタトラッカーでサンタさんを追いかけるのに夢中になってるの可愛いすぎませんか?????????
— むーむー/Atsuko FUKUI (@muumuumuumuu) December 24, 2018
RecyclerView in RecyclerViewだとAppBarLayoutがスクロールしないことがある
Nested Scroll(RecyclerView in RecyclerView)とAppBarの組み合わせでうまくいかないことがあったのでメモします。
前提
RecyclerViewが入れ子になってNested Scrollする画面で、
- Parent
RecyclerViewはvertical scroll - Child
RecyclerViewはhorizontal scroll
といった挙動をします。
ParentのRecyclerViewは CoordinatorLayoutを親に持っていて、AppBarLayoutがParentのRecyclerViewのスクロールに応じてアニメーションするといった挙動を想定しています。
問題
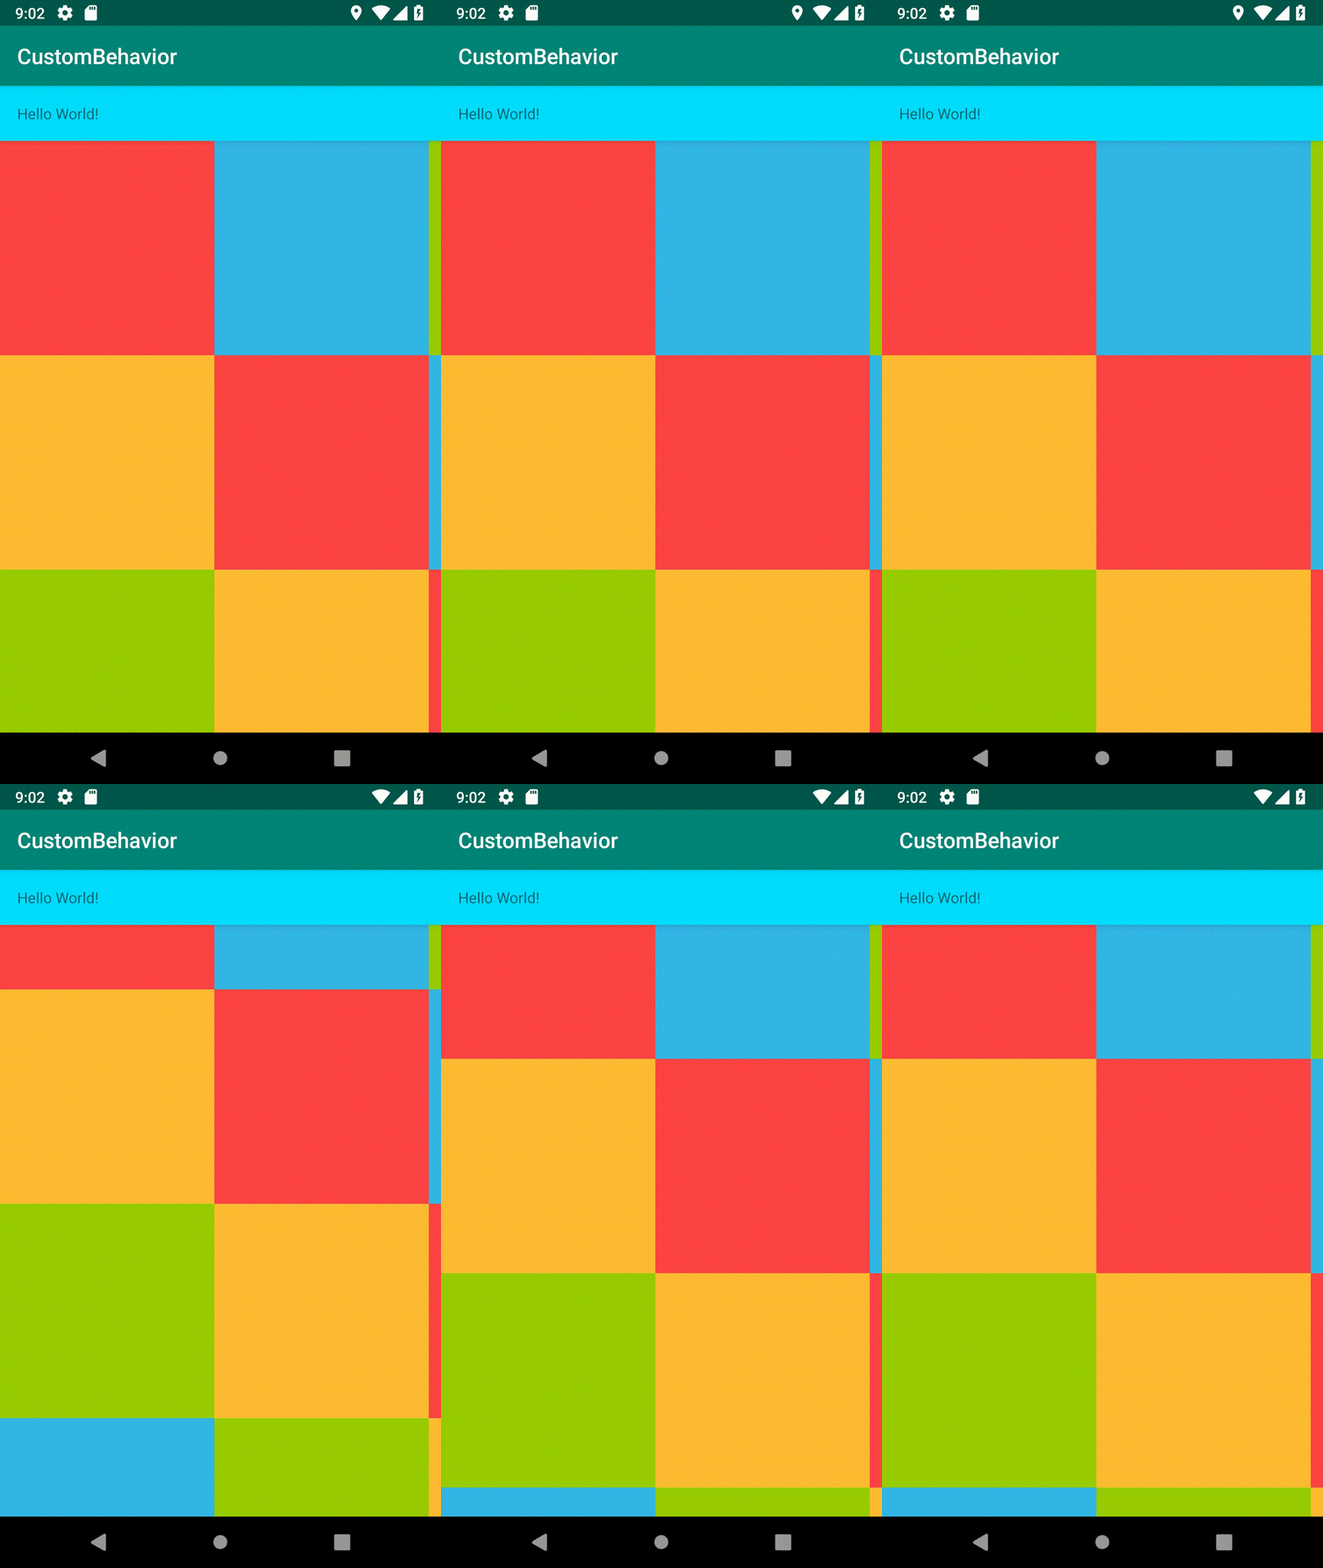
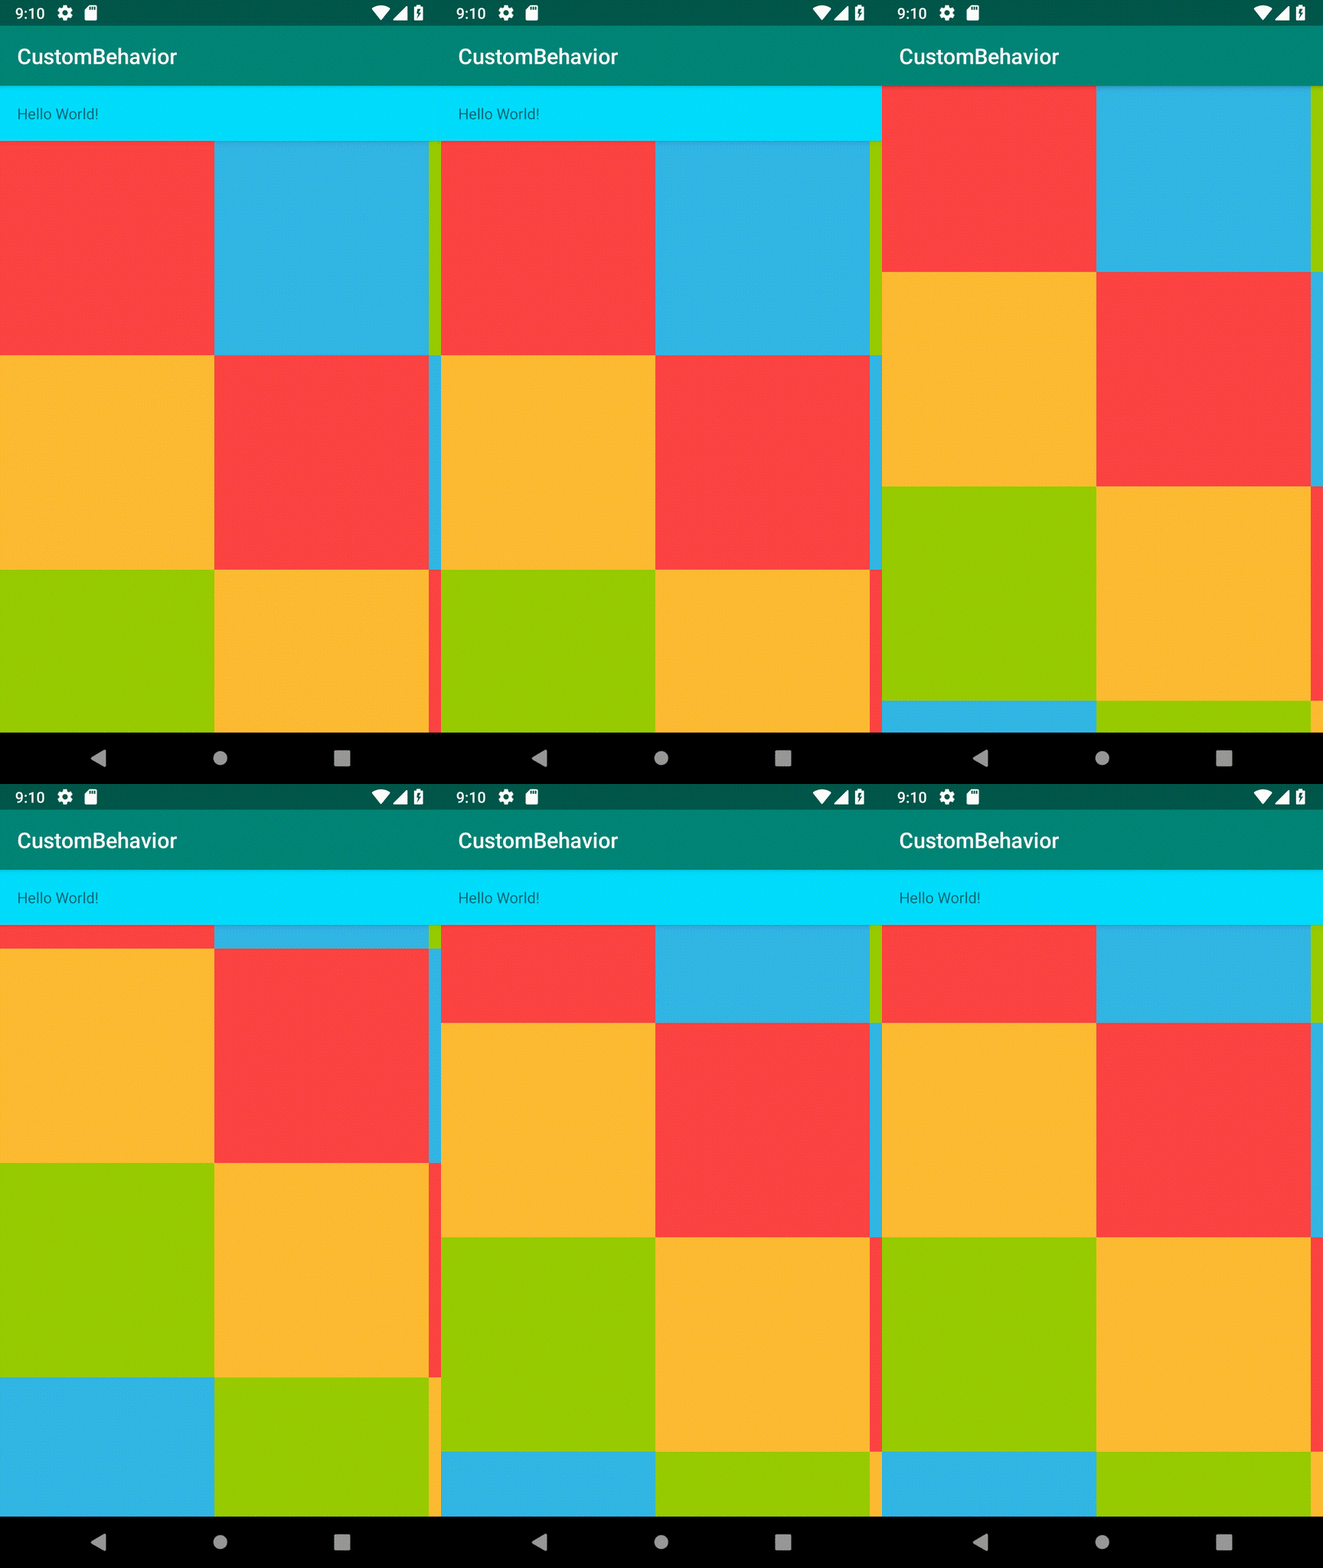
ParentのRecyclerViewをスクロールさせてもAppBarLayoutは変化しません。
(水色のViewがAppBarLayoutに包まれています。)

(同じParentにスクロールしないchildを入れてやり、その上からスクロールを開始するとAppBarはちゃんと正常にアニメーションします。)
直し方
Child RecyclerViewの NestedScrollingEnabled() にfalseを設定してやればうまくいきます。
コードからだとこんな感じ
childRecyclerView.isNestedScrollingEnabled = false
xmlからも指定できます
<android.support.v7.widget.RecyclerView
    ...(省略)...
    android:nestedScrollingEnabled="false"
上記のようにChild `RecyclerViewがnested scrollしないことを明示的に指定するだけでAppBarがアニメーションするようになります。

何が起こったか?
setNestedScrollingEnabled() を設定することによってどこが変わるかというと、NestedScrollingChildHelper#dispatchNestedPreScroll()がfalseを返すようになります。
RecyclerViewのdispatchNestedPreScroll() を呼んだ先でNestedScrollingChildHelper#dispatchNestedPreScroll() -> ViewParentCompat.onNestedPreScroll() -> CoordinatorLayout#onNestedPreScroll() -> AppBarLayout.BaseBehavior#onNestedPreScroll() と伝播していきます。
Scrollしない時はAppBarLayoutの onNestedPreScroll() のdyの値が正常に渡って来ません。
    public boolean dispatchNestedPreScroll(int dx, int dy, @Nullable int[] consumed, @Nullable int[] offsetInWindow, int type) {
        if (this.isNestedScrollingEnabled()) {

                ViewParentCompat.onNestedPreScroll(parent, this.mView, dx, dy, consumed, type);

        }

        return false;
    }
ここでisNestedScrollingEnabled() がfalseを返さないと本来子のRecyclerViewはVerticalなscrollをしないはずなのにonNestedPreScroll() のdyの値が変なまま伝播していってしまってうまくAppBarLayoutがアニメーションできないのかな?と予想しています。(RecyclerViewが巨大すぎて細かい部分まで追えていないのでもし違っていたらコメントで指摘してもらえると助かります。)
AppBarLayout.BaseBehavior#onNestedPreScroll() でscroll()が呼ばれます。
        public void onNestedPreScroll(CoordinatorLayout coordinatorLayout, T child, View target, int dx, int dy, int[] consumed, int type) {
            if (dy != 0) {
                int min;
                int max;
                if (dy < 0) {
                    min = -child.getTotalScrollRange();
                    max = min + child.getDownNestedPreScrollRange();
                } else {
                    min = -child.getUpNestedPreScrollRange();
                    max = 0;
                }

                if (min != max) {
                    consumed[1] = this.scroll(coordinatorLayout, child, dy, min, max);
                    this.stopNestedScrollIfNeeded(dy, child, target, type);
                }
            }

        }
この先HeaderBehavior#scroll() がsetHeaderTopBottomOffset()などを呼んで最終的にView#offsetTopAndBottom()が呼ばれます。
ここで不正に渡って来たdyの値によって、スクロールしていなかったことになっているんじゃないかなぁ。
ちなみにsetNestedScrollingEnabled()はデフォルトでtrueを返すの?と思った人がいるかもしれませんが、このフラグはRecyclerViewのコンストラクタでtrueが設定されます。
    public RecyclerView(@NonNull Context context, @Nullable AttributeSet attrs, int defStyle) {

        boolean nestedScrollingEnabled = true; // defaultでtrue
        if (attrs != null) {

            if (VERSION.SDK_INT >= 21) {
                a = context.obtainStyledAttributes(attrs, NESTED_SCROLLING_ATTRS, defStyle, defStyleRes);
                nestedScrollingEnabled = a.getBoolean(0, true); // xmlで指定されていれば反映する
                a.recycle();
            }

        this.setNestedScrollingEnabled(nestedScrollingEnabled);
    }
selectableItemBackgroundはBackgroundにセットしないと意図した挙動にならない話
タイトルが意味わからないことになっている😇
はじめに
AndroidはAPI Level 21 (Android 5.0 / Lollipop) からRipple Effectがサポートされ、これによりより良いタッチフィードバックをユーザに提供できることができる。ボタンなど、「もともとタップが想定されているView」については、タップした際にデフォルトでRipple Effectが表示されている。ただのViewだったりTextViewなど「デフォルトでタップが想定されていないView」についてもシステムが用意したdrawable resourceを設定することで簡単に実現できる。
システムが用意したdrawable resourceは(自分の知る限り)2種類ある。
これをViewのbackground/foregroundにセットするかでまた挙動が変わるという面白い現象を見つけたので調べてみた。
組み合わせでどう変わる?
まずは2種類のresourceの説明をそれぞれしていこう。Ripple Effectのcolorやdurationは変わらないのだが、selectableItemBackgroundBorderlessの方はその名の通りBorderless、つまりViewのboundaryを超えてRipple Effectを表示することができる。幅・高さが小さいViewに対してタッチフィードバックをつけるのに大変便利だ。ただし、ViewのBackgroundにセットした場合のみで、Foregroundにセットした時にはselectableItemBackgroundと同じ挙動になる。

(上記のサンプルコードはリンクを参照)
さて、それぞれどうして差が出るのかコードを追っていこう。
それぞれ指定されたResourceは何をやっているのか?
Borderless
selectableItemBackgroundBorderlessを指定した場合、最終的にこのxmlが読み込まれる。
     17 <ripple xmlns:android="http://schemas.android.com/apk/res/android"
     18     android:color="?attr/colorControlHighlight" />
Borderlessじゃない方
selectableItemBackgroundを指定した場合、最終的にこのxmlが読み込まれる。
     17 <ripple xmlns:android="http://schemas.android.com/apk/res/android"
     18     android:color="?attr/colorControlHighlight">
     19     <item android:id="@id/mask">
     20         <color android:color="@color/white" />
     21     </item>
     22 </ripple>
これらのrippleタグは最終的にRippleDrawableに変換される。
BackgroundとForegroundで挙動が異なる
RippleDrawableクラスの公式ドキュメントを見ると下記のような記載がある。
If no child layers or mask is specified and the ripple is set as a View background, the ripple will be drawn atop the first available parent background within the View's hierarchy. In this case, the drawing region may extend outside of the Drawable bounds.
わざわざ "as a View background" と書いてあるように、backgroundに指定した場合のみViewのhierarchyを辿ってparentのbackground内まで描画することができるようだ。
せっかくなのでコードを読んでみよう
RippleDrawableはLayerDrawableをextendsしているのでlayerを重ねることができる。これでmaskをかけている。
    189     public RippleDrawable(@NonNull ColorStateList color, @Nullable Drawable content,
    190             @Nullable Drawable mask) {
    191         this(new RippleState(null, null, null), null);


    201         if (mask != null) {
    202             addLayer(mask, null, android.R.id.mask, 0, 0, 0, 0);
    203         }
このmastが影響してくるのはdraw()の時
    688     @Override
    689     public void draw(@NonNull Canvas canvas) {
    690         pruneRipples();
    691
    692         // Clip to the dirty bounds, which will be the drawable bounds if we
    693         // have a mask or content and the ripple bounds if we're projecting.
    694         final Rect bounds = getDirtyBounds();
    695         final int saveCount = canvas.save(Canvas.CLIP_SAVE_FLAG);
    696         canvas.clipRect(bounds);
    697
    698         drawContent(canvas);
    699         drawBackgroundAndRipples(canvas);
    700
    701         canvas.restoreToCount(saveCount);
    702     }
getDirtyBounds() はmaskがある時とないときで挙動が変わる
    922     @Override
    923     public Rect getDirtyBounds() {
    924         if (!isBounded()) {
    925             final Rect drawingBounds = mDrawingBounds;
    926             final Rect dirtyBounds = mDirtyBounds;
    927             dirtyBounds.set(drawingBounds);
    928             drawingBounds.setEmpty();
    929
    930             final int cX = (int) mHotspotBounds.exactCenterX();
    931             final int cY = (int) mHotspotBounds.exactCenterY();
    932             final Rect rippleBounds = mTempRect;
    933
    934             final RippleForeground[] activeRipples = mExitingRipples;
    935             final int N = mExitingRipplesCount;
    936             for (int i = 0; i < N; i++) {
    937                 activeRipples[i].getBounds(rippleBounds);
    938                 rippleBounds.offset(cX, cY);
    939                 drawingBounds.union(rippleBounds);
    940             }
    941
    942             final RippleBackground background = mBackground;
    943             if (background != null) {
    944                 background.getBounds(rippleBounds);
    945                 rippleBounds.offset(cX, cY);
    946                 drawingBounds.union(rippleBounds);
    947             }
    948
    949             dirtyBounds.union(drawingBounds);
    950             dirtyBounds.union(super.getDirtyBounds());
    951             return dirtyBounds;
    952         } else {
    953             return getBounds();
    954         }
    955     }
さて、ここまででselectableItemBackgroundBorderlessとselectableItemBackgroundの違いがわかった。
次はBackgroundとForegroundで挙動が変わるところをみてみよう。
RippleDrawable#isProjected()というメソッドの中で、タップされた場所から円を描いて自分のサイズに収まるかどうかをみている。maskされたlayerが存在する場合もfalseを返している。
  344     @Override
    345     public boolean isProjected() {
    346         // If the layer is bounded, then we don't need to project.
    347         if (isBounded()) {
    348             return false;
    349         }
    350
    351         // Otherwise, if the maximum radius is contained entirely within the
    352         // bounds then we don't need to project. This is sort of a hack to
    353         // prevent check box ripples from being projected across the edges of
    354         // scroll views. It does not impact rendering performance, and it can
    355         // be removed once we have better handling of projection in scrollable
    356         // views.
    357         final int radius = mState.mMaxRadius;
    358         final Rect drawableBounds = getBounds();
    359         final Rect hotspotBounds = mHotspotBounds;
    360         if (radius != RADIUS_AUTO
    361                 && radius <= hotspotBounds.width() / 2
    362                 && radius <= hotspotBounds.height() / 2
    363                 && (drawableBounds.equals(hotspotBounds)
    364                         || drawableBounds.contains(hotspotBounds))) {
    365             return false;
    366         }
    367
    368         return true;
    369     }
このメソッドが呼ばれるのはViewクラスのgetDrawableRenderNode().
   19433     private RenderNode getDrawableRenderNode(Drawable drawable, RenderNode renderNode) {
   19434         if (renderNode == null) {
   19435             renderNode = RenderNode.create(drawable.getClass().getName(), this);
   19436         }

   19457         renderNode.setProjectBackwards(drawable.isProjected());
ここでsetしたProjectBackwardsが呼ばれるのはこの辺?(Nativeコード詳しくないマンなので間違ってたらごめんなさい)
    101 void RenderNodeDrawable::forceDraw(SkCanvas* canvas) {


    120     //pass this outline to the children that may clip backward projected nodes
    121     displayList->mProjectedOutline = displayList->containsProjectionReceiver()
    122             ? &properties.getOutline() : nullptr;
    123     if (!properties.getProjectBackwards()) {
    124         drawContent(canvas);
    125         if (mProjectedDisplayList) {
    126             acr.restore(); //draw projected children using parent matrix
    127             LOG_ALWAYS_FATAL_IF(!mProjectedDisplayList->mProjectedOutline);
    128             const bool shouldClip = mProjectedDisplayList->mProjectedOutline->getPath();
    129             SkAutoCanvasRestore acr2(canvas, shouldClip);
    130             canvas->setMatrix(mProjectedDisplayList->mProjectedReceiverParentMatrix);
    131             if (shouldClip) {
    132                 clipOutline(*mProjectedDisplayList->mProjectedOutline, canvas, nullptr);
    133             }
    134             drawBackwardsProjectedNodes(canvas, *mProjectedDisplayList);
    135         }
    136     }
    137     displayList->mProjectedOutline = nullptr;
    138 }
確かにProjectedされたoutlineをclipしているように見える。
で、話を戻してViewクラスのgetDrawableRenderNode()がいつ呼ばれるかというと、View#drawBackground()からのみコールされている。
   19375     private void drawBackground(Canvas canvas) {
   19376         final Drawable background = mBackground;
   19377         if (background == null) {
   19378             return;
   19379         }
   19380
   19381         setBackgroundBounds();
   19382
   19383         // Attempt to use a display list if requested.
   19384         if (canvas.isHardwareAccelerated() && mAttachInfo != null
   19385                 && mAttachInfo.mThreadedRenderer != null) {
   19386             mBackgroundRenderNode = getDrawableRenderNode(background, mBackgroundRenderNode);
   19387
   19388             final RenderNode renderNode = mBackgroundRenderNode;
   19389             if (renderNode != null && renderNode.isValid()) {
   19390                 setBackgroundRenderNodeProperties(renderNode);
   19391                 ((DisplayListCanvas) canvas).drawRenderNode(renderNode);
   19392                 return;
   19393             }
   19394         }
というわけでbackgroundとforegruondで挙動に差分が出るのはここでした。解決!
Shared element transitionでリストの要素を並び替える
やりたいこと
Fragmentを切り替えてReordering(要素を並び替え)する shared element transition の記事を見て楽しそうだったからやってみた。
medium.com
全く同じことをやっても楽しくないので、Fragment <-> Activityでやってみる。
できた
いきなりだけど成果物

コードはこの辺
やったこと
Activityで shared element transition するには startActivity() するときに第2引数にtransition animationのbundleを渡してやる必要がある。
transition animationを作るのに必要なのは下記のPair.
- 移動元になるview
- 上記viewに対して一意になるID
今回はリストの並び替えなので上記のpairを並び替えたいViewの数だけ持つ必要がある。
RecyclerView でリストを表示している場合、Adapterの onBindViewHolder で各Viewにアクセスできるのでこれを保持しておく。
class ReorderingAdapter(private val activity: Activity)
    : RecyclerView.Adapter<ReorderingViewHolder>() {

    val items = mutableListOf<ImageView>() // adapterのpropertyとしてmutableListを持つ

    override fun onBindViewHolder(holder: ReorderingViewHolder, position: Int) {
        holder.bind(position)
        if (!items.contains(holder.image)) {
            items.add(holder.image) // 画面に表示されたタイミングでlistに追加
        }
    }

}
実際に並び替えを実行するタイミングで保持していたviewのリストからtransition animation用のbundleを生成する。
fab.setOnClickListener {
    context?.let {
        val itemList = mutableListOf<Pair<View, String>>()
        (recycler.adapter as? ReorderingAdapter)?.items?.forEachIndexed { index, view ->
            itemList.add(Pair(view, IMAGE_TRANSITION_NAME + index))
        }

        val options = ActivityOptionsCompat.makeSceneTransitionAnimation(
            activity as Activity, *itemList.toTypedArray()
        ).toBundle()
        ReorderingActivity.start(it, options)
    }
}
並び替え後のviewの方でも同じIDを設定する。
itemView.setTag(R.id.position, position)
ViewCompat.setTransitionName(image, IMAGE_TRANSITION_NAME + position)
あとは普通の Shared element transition のように postponeEnterTransition() したり見た目の微調整して終わり。
注意点として、画面に表示されていないものはanimationの対象にならない。
そもそも onBindViewHolder() を通らないとitemsのlistにaddできないが、仮にlistに存在していたとしても画面外だったらanimationされない。RecyclerViewを使っていたのですでにrecycleされてしまっている場合はviewがなくなっちゃってるからanimationできないのかな。
おまけ
transition animation用のbundleを生成する時に ActivityOptionsCompat#makeSceneTransitionAnimation() を使うが、このメソッドの第2引数が可変長引数になっている。
    @NonNull
    @SuppressWarnings("unchecked")
    public static ActivityOptionsCompat makeSceneTransitionAnimation(@NonNull Activity activity,
            Pair<View, String>... sharedElements) {
        if (Build.VERSION.SDK_INT >= 21) {
            android.util.Pair<View, String>[] pairs = null;
            if (sharedElements != null) {
                pairs = new android.util.Pair[sharedElements.length];
                for (int i = 0; i < sharedElements.length; i++) {
                    pairs[i] = android.util.Pair.create(
                            sharedElements[i].first, sharedElements[i].second);
                }
            }
            return createImpl(ActivityOptions.makeSceneTransitionAnimation(activity, pairs));
        }
        return new ActivityOptionsCompat();
    }
可変長引数にListを渡すときは一度Arrayに型変換してからspread operator(*)を使う。
*itemList.toTypedArray()
2018年前半を振り返る
はじめに
2018年前半に自分が何をしていたか後から振り返られるようにメモを残しておく。2017年のまとめと同じく自分のtweetを振り返ってペタペタしていく。本当は年末にまとめて一年分やりたかったがtweet数が多すぎて一気にやると辛いという前回の反省を生かして2018年は半分に区切っていく。
前回のまとめはこちら
1月
この時点で割と仕事に余裕があるときは隙あらば有休消化に励んでいた気がする。同じく(・∀・) https://t.co/4aR39jEUUh
— むーむー/Atsuko FUKUI (@muumuumuumuu) 2018年1月4日
普段アニメをあまりみないけどずっと気になっていた廻るピングドラムを見始めた。最初はサイコホラーなのかサスペンスなのかシュールコメディなのかわからなかったけど後半一気に止まらない感じがすごかった。Prime Videoに廻るピングドラムきてるー!!やったー!!一話だけ見てみたけど「生存戦略」の元ネタこれだったのね
— むーむー/Atsuko FUKUI (@muumuumuumuu) 2018年1月4日
社のslackに「生存戦略」のスタンプがあってなんだろうと思っていたけど元ネタがわかってスッキリ。
第24回 Androidもくもく勉強会@ Rettyオフィス を公開しました!今回が最終回となります!皆様ぜひご参加くださいませ〜!!٩( 'ω' )و #AndroidMokuMokuRetty https://t.co/qKFuWYNN0o
— むーむー/Atsuko FUKUI (@muumuumuumuu) 2018年1月11日
過去最高に人数多いので今日は楽しい! #AndroidMokuMokuRetty
— むーむー/Atsuko FUKUI (@muumuumuumuu) 2018年1月30日
長らく続けていたAndroidもくもく会、自分の退職に伴い最終回を迎えた。運営している自分もとっても楽しかったし本当にありがとうございました!みなさま本日はありがとうございました!またどこかでお会いしましょう!延長戦は大好きなビストロチック、フォアグラのパイ包みアップルパイ風とリゾットが絶品でした♥️ https://t.co/1CdPWK7j7m #AndroidMokuMokuRetty pic.twitter.com/Ljp49IgZ1U
— むーむー/Atsuko FUKUI (@muumuumuumuu) 2018年1月30日
今年は(まだ半分しか終わってないけど)これと同じ内容5回くらいつぶやいている気がする。今でも絶対にフォローしているつもりだけど実はフォローしていない人いっぱいいそうだ。Twitter昔と違ってフォローしてない人の投稿もガンガン流れてくるので、あれ?まだこの人フォローしてなかったんだっけ!?みたいな気持ちになる。
— むーむー/Atsuko FUKUI (@muumuumuumuu) 2018年1月15日
DroidKaigi appにコントリビュートする実績解除した。DroidKaigi conf appについにコントリビュートできた 🎉🎉 去年は自分の資料作るのに必死だったから一年越しの念願達成だ〜!メンテナーのみなさんめちゃめちゃリアクションとレビューが早いのでびっくり!すごい!
— むーむー/Atsuko FUKUI (@muumuumuumuu) 2018年1月18日
DroidKaigi preludeでgfxさんと二人でセッション解説をやった。会場にいた誰よりも楽しんでいた自信があるw今日はこれ解説枠で出ます!残念ながらshirajiさんはご家族の都合でいらっしゃらないとのことなので、gfxさんと二人解説。どきどき… 好きなこといっぱい話せるといいな! https://t.co/aSXxKfGNZW #dk_prelude
— むーむー/Atsuko FUKUI (@muumuumuumuu) 2018年1月26日
最終出社日、最後のPRで自分で自分を消すやつ、一度やってみたかったので記念スクショ撮ってた。ずっとやりたかったやつ☺️☺️☺️ pic.twitter.com/vMsn2D9x6U
— むーむー/Atsuko FUKUI (@muumuumuumuu) 2018年1月31日
1月は送別会とかでたくさん美味しいもの食べたり、寄せ書きが嬉しすぎて号泣したり忙しかった。幸せなことだな〜〜〜
2月
今日から暫く週休7日生活ですが、記念すべき第一日めは家から一歩も出ずに過ごせました
— むーむー/Atsuko FUKUI (@muumuumuumuu) 2018年2月1日
2月から丸一ヶ月有休消化で寒すぎて引きこもりまくってた。週休七日生活、始める前はもっと昼くらいまで寝てたりとか、明るいうちからガンガンお酒飲んだりとか、会社員だとできない自堕落な生活を送りまくるかと思っていたけど、実際は出社していた時よりも早い時間から作業を開始するし毎日家事もちゃんとするし自分のハイ意識さにびっくりしている
— むーむー/Atsuko FUKUI (@muumuumuumuu) 2018年2月19日
撮り逃してたと思ったらTwitterにあげてくれている方がいたので嬉しい☺️☺️☺️ https://t.co/XK2IqJiCsO
— むーむー/Atsuko FUKUI (@muumuumuumuu) 2018年2月8日
こにふぁーさんに「今無職なんですか?」って聞かれたのと、おがぱんさんと写真とれたのが今日のハイライト
— むーむー/Atsuko FUKUI (@muumuumuumuu) 2018年2月8日
DroidKaigi今年も楽しかったー!!!脳がへろへろだー。なにも考えずに雲丹食べるぞ!!!
— むーむー/Atsuko FUKUI (@muumuumuumuu) 2018年2月9日
DroidKaigi、今年はオーディエンス参加だった。濃い二日間でした!
確定申告めちゃめちゃめんどくさい…なんで余分に労働したり消費したりして社会に貢献しているのにこんな罰ゲームみたいな目にあうんだ
— むーむー/Atsuko FUKUI (@muumuumuumuu) 2018年2月11日
今年は初めて確定申告した。一度フローを理解するとそんなでもないはずなんだけど、初回はなかなかつらみがあった。確定申告一瞬で終わって逆にめっちゃ不安なんだけど…
— むーむー/Atsuko FUKUI (@muumuumuumuu) 2018年2月21日
2月にこんなことをつぶやいているけど、2018年後半始まっても未だに毎月スターエンジニアが誰かしら転職している気がする。私が言うのもなんだけど、ここ最近のAndroid界隈、今までで一番転とか離とか多い気がするな?(当社比)
— むーむー/Atsuko FUKUI (@muumuumuumuu) 2018年2月13日
Paymoの残高まだまだ余ってます。Paymo支払いの飲み会とかやりたい。ただしPaymoで支払う側として。そういえば弊社は美味しいもの好きな人が異常に多くて、みんなで外食する機会も多いのでまとめて払う事が多かった私はpaymo残高が40000円近く残っているけど、次の職場で割り勘アプリ使う機会はあるのだろうか🤔
— むーむー/Atsuko FUKUI (@muumuumuumuu) 2018年2月22日
南の島にきました pic.twitter.com/2ExrMxuBmM
— むーむー/Atsuko FUKUI (@muumuumuumuu) 2018年2月23日
有休消化でのんびり南の島にバカンスに行った。一人で。今までいったどの都市よりもサムイ島の接客業の人はにこにこしてる。さすが微笑みの国タイ!今日は笑顔が素敵な推しのレストランで働いている女の子が、夕方に彼氏が迎えに来てスクーターの後ろにのって一緒に帰ってるの目撃しちゃって、何それ最高じゃない?ってなってる今
— むーむー/Atsuko FUKUI (@muumuumuumuu) 2018年2月24日
主にビーチサイドで本を読んでいたんだけど、そのとき読んだ本の記録はこちら。 muumuutech.hatenablog.com
日本に戻って来たら花粉が飛び始めていた。東京思ったより寒くない。やったー!しかし今日から花粉との戦いが始まるのかー( ;∀;)
— むーむー/Atsuko FUKUI (@muumuumuumuu) 2018年2月27日
3月
新しい職場。外国人の同僚も多いのでここから英語も併記したりし始めている。同期入社(join at the same day) with @rallat 😎 https://t.co/9EiB6M22qB
— むーむー/Atsuko FUKUI (@muumuumuumuu) 2018年3月1日
花粉がマジで辛い目と鼻と喉に深刻なダメージ
— むーむー/Atsuko FUKUI (@muumuumuumuu) 2018年3月4日
新しい職場でももくもく会をやっていくぞ!どうも、もくもく会歴長い新メンバーです✋六本木でもやってくぞ!! #mokumoku_android https://t.co/13ucmQvvLN
— むーむー/Atsuko FUKUI (@muumuumuumuu) 2018年3月14日
次回の開催はこちら
mercari-android-mokumoku.connpass.com
Flutter盛り上がって来たFlutter楽しそうだな〜 #potatotips
— むーむー/Atsuko FUKUI (@muumuumuumuu) 2018年3月13日
shibuya.apkがライブ配信されるようになった。DeployGateさんのオフィスで配信見ながら女子エンジニア会。美味しいお料理とお酒で最高だったshibuya apk見ながら美味しいお酒とごはんで圧倒的勝ち組…!配信ありがとうございます🙏🙏 https://t.co/CaHikcnMIw
— むーむー/Atsuko FUKUI (@muumuumuumuu) 2018年3月20日
友人の家でバーフバリ鑑賞会をやった。ボリウッド映画多分初めてだったけど楽しかった!バーフバリ鑑賞会楽しかった
— むーむー/Atsuko FUKUI (@muumuumuumuu) 2018年3月31日
4月
Android Dagashiデビューしてテンションが上がっていたAndroid Dagashi デビューしてるぞわーい!!!! thagikuraさんがツイートしてくれてるのdagashiのコメントみて初めて知った…!!🙏🙏🙏🙏 https://t.co/pd0fng1nT3
— むーむー/Atsuko FUKUI (@muumuumuumuu) 2018年4月2日
本日はこちらのトークセッションに参加しますー٩( 'ω' )وhttps://t.co/4lWclIplmm
— むーむー/Atsuko FUKUI (@muumuumuumuu) 2018年4月7日
Women Techmakers Tokyo 2018 楽しかったー!!一番印象的だったのはAndroid Thingsのチュータで参加した @futabooo が「普段女性が勉強会に参加するとこんな感じなんですね」と言っていたこと。 #wtm18 #WTMTokyo
— むーむー/Atsuko FUKUI (@muumuumuumuu) 2018年4月7日
IWDのトークセッションに参加した。 kinukoさんkeynoteが素晴らしすぎて、この資料は定期的に見返したい
#wtm18 #WTMTokyo 先ほどのスライドです。あまり普段話さない内容で緊張しました😀 https://t.co/Cq8tIgSeH9 技術者としてキャリアを築くには / 大きなプロジェクトを回すには
— Kinuko Yasuda (@kinu) 2018年4月7日
Flutter勉強会やった来週Flutterの勉強会やります!15分LT枠が空いているのでこれを機にFlutterやってみるぜ!!!って方!!!ぜひ!!!!!https://t.co/it29jmvUzr
— むーむー/Atsuko FUKUI (@muumuumuumuu) 2018年4月9日
勉強会の前に自分でも触ってみるか〜と思って試したらこのザマFlutterのproject作る時に作成場所ミスったら既存アプリのコードが全部吹っ飛んだ時の顔してる
— むーむー/Atsuko FUKUI (@muumuumuumuu) 2018年4月10日
築地市場が移転する前に早朝のツアーに行ってみた。マグロのせりの見学、何言っているか全く聞き取れなかった
— むーむー/Atsuko FUKUI (@muumuumuumuu) 2018年4月13日
I can't understand what they yelling at tuna auction even though I am Japanese! 😂 pic.twitter.com/4rtl6Ee7jI
ツアーは基本的に英語だし参加者もほとんど外国人でここどこだっけ?ってなった築地のせり見学ツアー待ち。ここでは英語がスタンダードっぽい
— むーむー/Atsuko FUKUI (@muumuumuumuu) 2018年4月13日
Now I came Tsukiji fish market and waiting tour started. English seems like standard language here.
優勝🍣🍣🍣🍣 pic.twitter.com/kMZM4GHpQf
— むーむー/Atsuko FUKUI (@muumuumuumuu) 2018年4月13日
最高かよ~~~ pic.twitter.com/uHtW7tLK1I
— むーむー/Atsuko FUKUI (@muumuumuumuu) 2018年4月14日
神田明神の狛犬はハンサム pic.twitter.com/IjLpk2uEbL
— むーむー/Atsuko FUKUI (@muumuumuumuu) 2018年4月14日
この日は築地だけじゃなく色々日本っぽいところを巡るデートをしていた明るいうちから蕎麦屋で呑むという実績を解除しました pic.twitter.com/QPehL957jH
— むーむー/Atsuko FUKUI (@muumuumuumuu) 2018年4月14日
5月
福岡のうどん食べても食べても減らなくてびっくりした pic.twitter.com/NbBjhT7Wn3
— むーむー/Atsuko FUKUI (@muumuumuumuu) 2018年5月18日
出張で福岡に来た今日はこれに参加するために福岡に来ています。福岡の皆様ハロー!https://t.co/07bm9JFZ2I
— むーむー/Atsuko FUKUI (@muumuumuumuu) 2018年5月18日
移動中の飛行機のお供で読んだOKR本よかった!

OKR(オーケーアール) シリコンバレー式で大胆な目標を達成する方法
- 作者: クリスティーナ・ウォドキー,及川卓也(解説),二木夢子
- 出版社/メーカー: 日経BP社
- 発売日: 2018/03/15
- メディア: 単行本
- この商品を含むブログ (1件) を見る
今日はこれで喋ります〜 #love_kotlin https://t.co/fWqdXL3QbX
— むーむー/Atsuko FUKUI (@muumuumuumuu) 2018年5月30日
Kotlin愛好会で登壇した
今からこの話します!Tシャツも最高に可愛いKotlin Tシャツなので見てくれ!! #love_kotlin https://t.co/IyzQwzKWqO
— むーむー/Atsuko FUKUI (@muumuumuumuu) 2018年5月30日
6月
— むーむー/Atsuko FUKUI (@muumuumuumuu) 2018年6月3日
白山パパ @fushiroyama と今井さん @tomoaki_imai とスシロール pic.twitter.com/nsdVQgNY8D
— むーむー/Atsuko FUKUI (@muumuumuumuu) 2018年6月6日
出張でアメリカのオフィスに一週間ほど行った。
生まれて初めて日本以外のオフィスで働いているんですけど、みんなすごく頻繁に"How’s it going?" とか'What's up?"とか一日に何度も声かけまくっていて、これが通常だと感じていると日本の平均的な労働環境はさみしいだろうなぁと思った。来週日本に戻ったらたくさん声かけよう。
— むーむー/Atsuko FUKUI (@muumuumuumuu) 2018年6月5日
なんか誤解を招いているかもなので補足すると、単純に異なるcontext(或いはprotocol)なだけでどちらがいいという話ではなくて、今回私が新たなcontextについて学ぶことができたので、そっちのcontextで過ごしてきた人に対してそのcontextで接してみようというただそれだけの話です。
— むーむー/Atsuko FUKUI (@muumuumuumuu) 2018年6月5日
海外オフィスでの雑な感想が今までで一番伸びた
一昨日Uberに置き忘れたiPhoneを昨晩無事回収した。あとでブログにまとめるけど、SIMは通話付きのやつ買っておいて本当に良かったと思った…
— むーむー/Atsuko FUKUI (@muumuumuumuu) 2018年6月8日
久しぶりに新卒で入った会社の人たちと飲んでいた。普段エンジニアの中でもweb系の本当に限られた人としかあってなかったんだなーと実感した新卒で入った会社の上司と先輩達と数年ぶりに飲んでめっちゃ楽しかった☺️☺️☺️
— むーむー/Atsuko FUKUI (@muumuumuumuu) 2018年6月29日
普段Web系の会社の人としか接する機会がないのだけれど、例えばエンジニアと言っても諸々違う文化で回っている社会が存在しているのだと改めて実感するいい機会だった。
おまけ
夫シリーズ
今日の夢は夫と結婚してない世界で、お別れしたけど、顔もぼんやりとしか思い出せない、目が覚めて隣に夫がいて本当よかった。そういう世界線も存在していた可能性はあるのだ。とても怖かった。
— むーむー/Atsuko FUKUI (@muumuumuumuu) 2018年1月20日
飲みに行けなかったのでスーパーで買い物して帰って来た。凍えて帰ってくる旦那さまのためにグラタン作って待つのだ。
— むーむー/Atsuko FUKUI (@muumuumuumuu) 2018年1月22日
夫がDroid君のことを「Droidマン」って呼ぶんだけど、急に可愛くなくなるので本当にやめて欲しい
— むーむー/Atsuko FUKUI (@muumuumuumuu) 2018年2月7日
激務時代の名残でごはんサボるときがたまにあるせいか、食事をとるだけで誉められるくらい夫に甘やかされていますが、今日はとうとうお茶を飲んでいるだけで誉められました。
— むーむー/Atsuko FUKUI (@muumuumuumuu) 2018年2月10日
夫と朝食を食べながら金曜日だね~という話をしていたら「ひさしぶりに1週間働いたね!」って言ってもらえて、平日普通に働いただけで労いの言葉をくれるなんてやっぱり天使なのかもしれない😇😇😇
— むーむー/Atsuko FUKUI (@muumuumuumuu) 2018年3月8日
夫に「指太くなった?」って聞かれたのでもうダメです
— むーむー/Atsuko FUKUI (@muumuumuumuu) 2018年4月15日
Android Frameworkのコードにbreakpointを止めるメモ
Android開発をしていると、Frameworkがどういう挙動をしているか調べたくなる時がある。そういう時はFrameworkのコードにbreakpointを置くんだけど、止まってくれたり止まらなかったりすることがあるので困っていた。
完全に理解した!と言いたいけど、ViewRootImplの中でbreak pointおいても止まらないし、ログ埋め込むわけにもいかないので多分あってるくらいなのが歯がゆい…Ubuntu環境があればログ追加したfreamwork.jar作って挙動確かめたい🙄組み込み系の人、誰か気軽にできるなら代わりにやってほしい笑
— むーむー/Atsuko FUKUI (@muumuumuumuu) July 15, 2018
このTweetに対して神リプライがついたので流れないようにメモしておく。
完全に横からであれですけど、昔フレームワーク側コードにブレークポイント置いて止めたりwatchしてた記憶があるので(変わってなければ)おそらくできるはず?実機だとフレームワークのコードに手が入ってて行数がズレてて止まらないとかはありますが、エミュレータはいけるかと
— Yuki Fujisaki / tnj (@tnj) July 15, 2018
いくつかやり方がありますね。👀動かしている端末にコンパイルSDKをあわせれば止まります。あとはメソッドの宣言のところに貼れば止まるのと、どこかのサイトで動かしているAndroid OSのバージョンのソースコードを確認して、その行数と同じところに貼れば止まると言う感じでやっていますね
— takahirom (@new_runnable) July 15, 2018
実際試したところ、Compile SDK versionと合わせたEmulatorを作ってそこで動かすというのが良さそう。